Burn a Breathtaking Portrait of Your Dog Into Real Wood

even if you've never held a woodburning pen in your life.

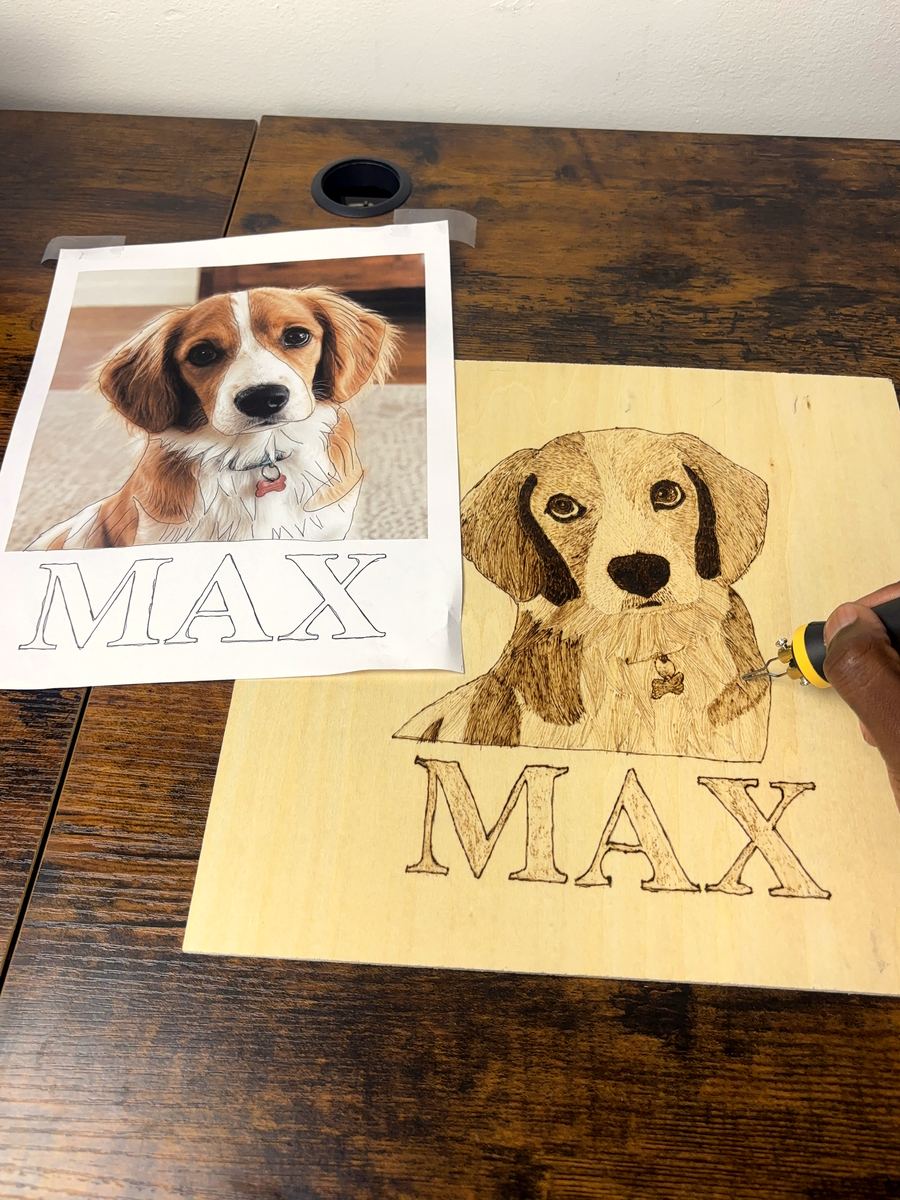
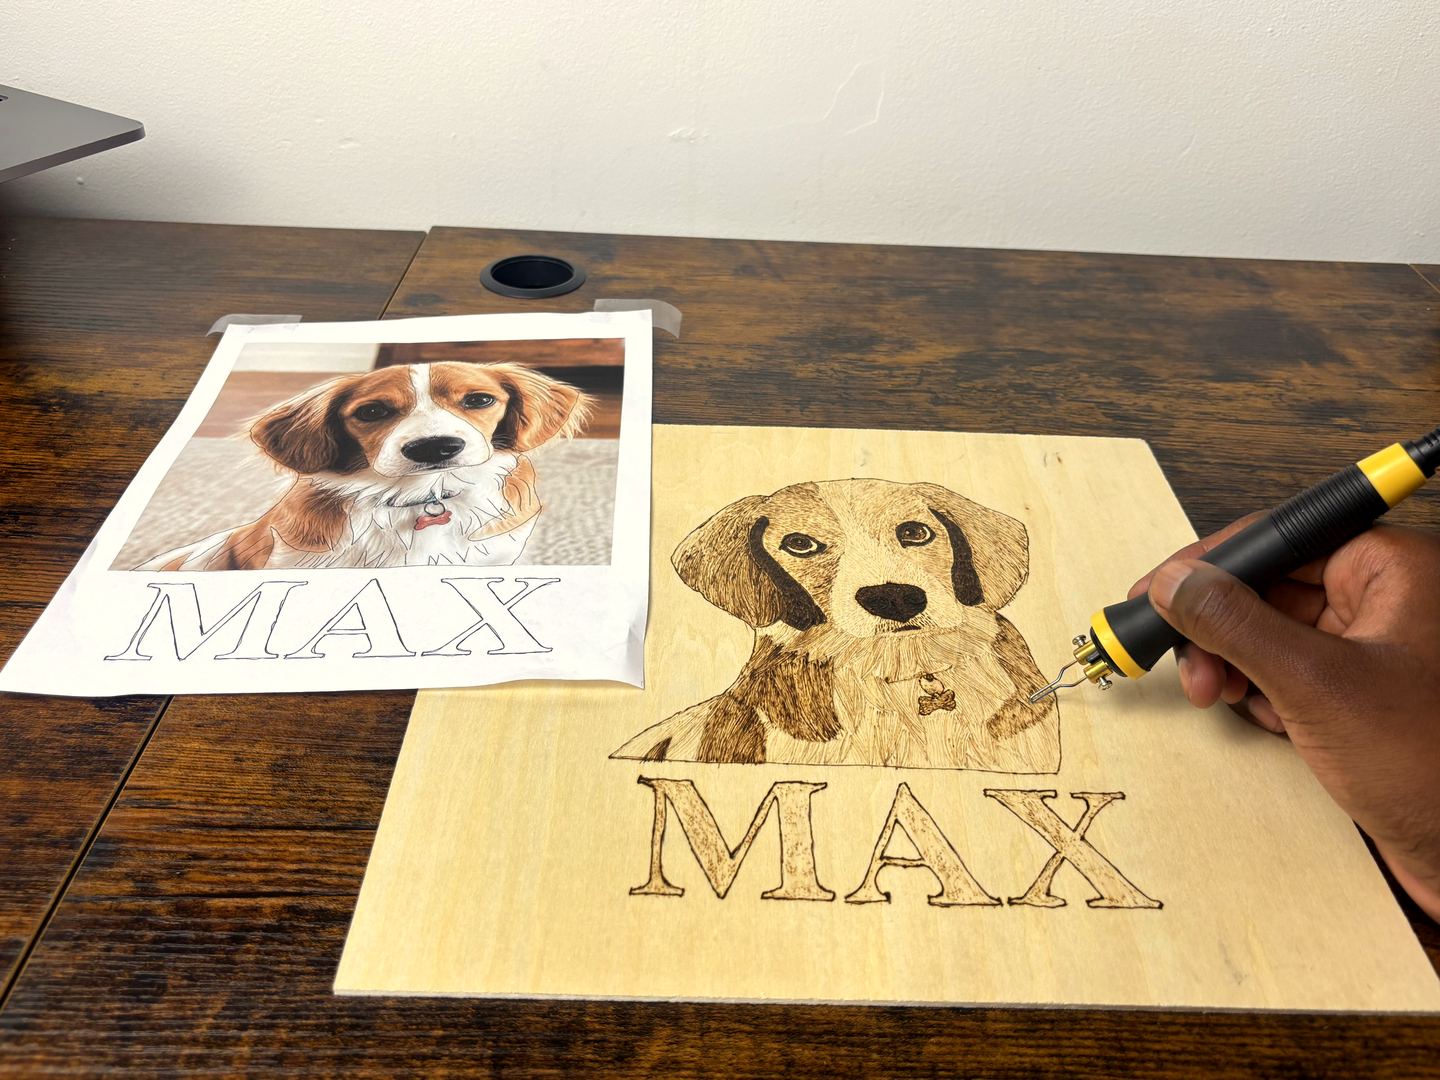
A hand burning the final details of a fluffy dog portrait into a live-edge wood slab, with the name MAX burned below

Imagine...

Imagine lifting the pen off the board, blowing away the last wisp of smoke, and seeing your dog's eyes looking back at you from the wood... a portrait you made with your own two hands, that will outlast any photo print.

Imagine the first person who walks into your living room, stops in front of the wall, and asks "wait... where did you BUY that?" And you get to say the four most satisfying words in any craft: "I didn't. I made it."

Imagine your evenings with the soft smell of warm cedar in the air, a photo clipped to your easel, and that quiet, focused calm as fur appears stroke by stroke under your pen. No screens. No noise. Just you, making something that matters.

And here's the part nobody believes at first...

The tool that creates all of this? It's a pen.

Not a workshop. Not a $500 machine. Not a garage full of equipment. A pen that plugs into the wall, costs less than $40 on Amazon, and fits in a drawer when you're done.

And it's one of the calmest tools you'll ever use. There's no open flame, no fumes from chemicals, no noise. The pen rests on its own little stand between strokes, you control the heat with a simple dial, and the whole thing works happily on a kitchen table with a cup of tea next to it. If you've ever handled a clothes iron, you already have all the "skills" required.

And no... you don't need to know how to draw. You'll never sketch your dog freehand.

one pen, one board, one photo. That's all you need.

(And in a minute, I'll show you exactly which pen to buy so you don't waste a cent.)

Have you ever seen something like this and thought:

"Oh wow... I NEED to make one of these for my dog."

So you order a cheap woodburning kit online. It arrives, you plug it in, you print a photo of your dog... and twenty minutes later you're staring at a scorched, blotchy outline that looks nothing like the fluffy, lifelike portraits you saw online.

So you do what everyone does. You open YouTube. You watch "pyrography for beginners" videos at midnight. You save Pinterest boards full of stunning dog portraits.

But here's the thing: those videos show you techniques in isolation. A shading trick here. A fur stroke there. Nobody shows you the actual process: where to start on the board, what order to burn in, how to go from a photo to a finished portrait without ruining the wood halfway through.

So you try for a few weekends. The burns come out too dark, or too patchy. The proportions drift. The fur looks like scribbles instead of hair. The board goes in a drawer.

And that little voice shows up:

"Maybe I just don't have the talent for this."

But what if...

...it's not that you lack talent.
...it's not that you need years more practice.

...it's that you've been burning without a system. Collecting random techniques instead of following a clear, ordered process from photo to finished portrait.

Here's the truth: pyrography dog portraits are built in layers, in a specific order. Map the photo. Block the shapes. Establish the light. Layer the fur. Detail the face. Finish and seal. When you follow that sequence, the portrait almost assembles itself... because every stroke has a job and a place.

All you need is a basic woodburning pen, a board, and a photo of a dog you love. And here I am. I'll show you step by step.

Introducing

The Dog Portrait Pyrography Academy

Turn any photo of your dog into a lifelike wood-burned portrait, one layer at a time.

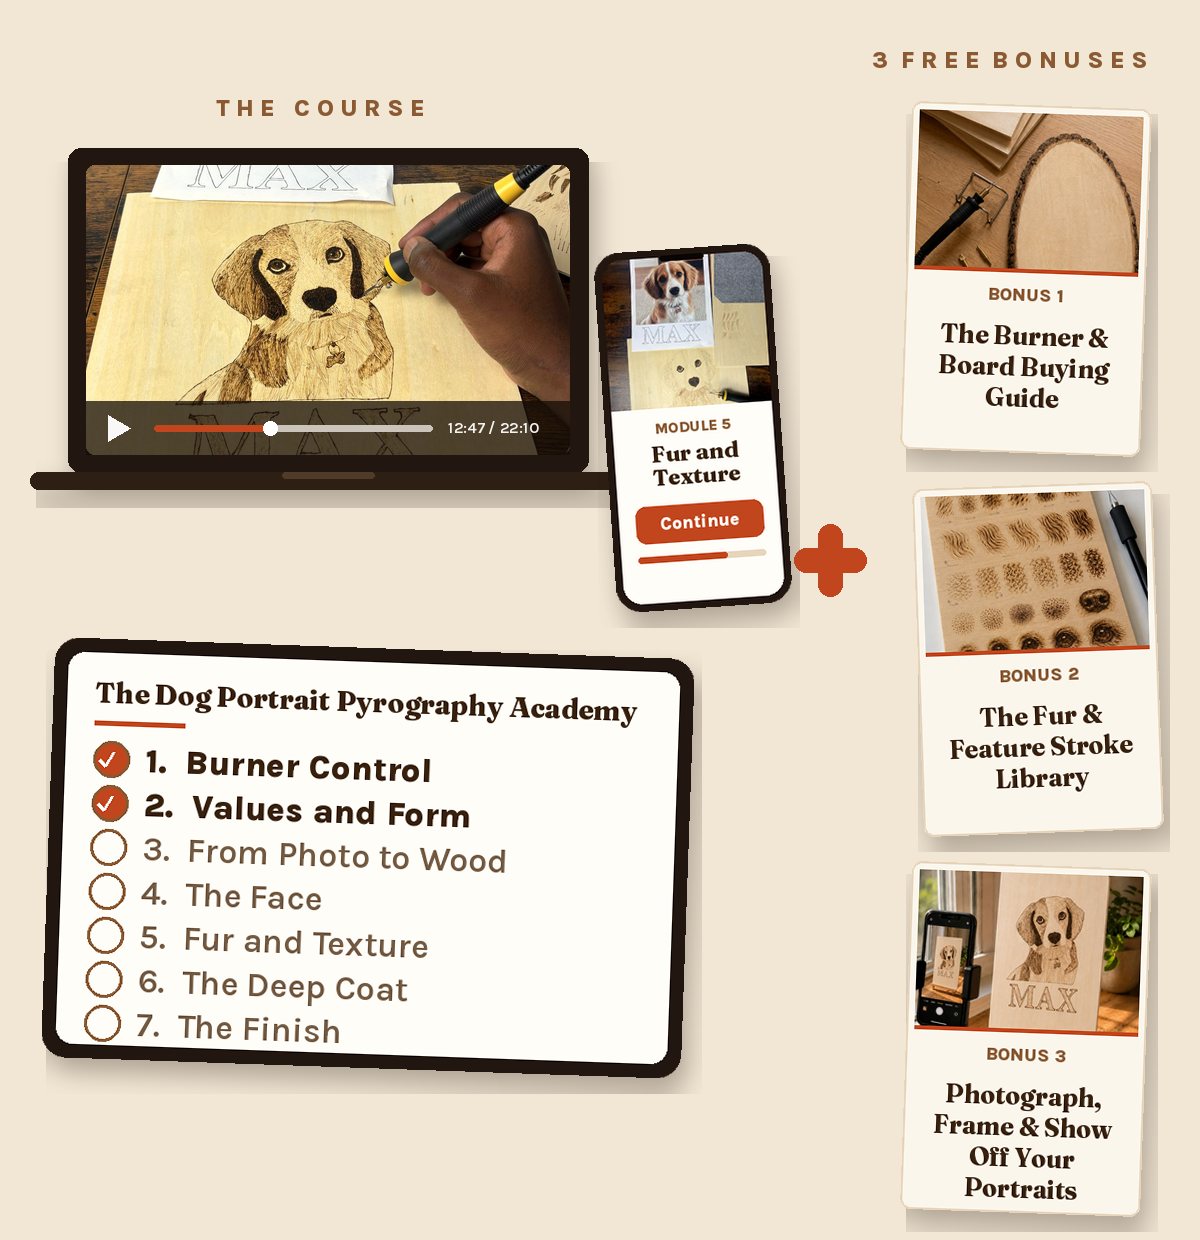
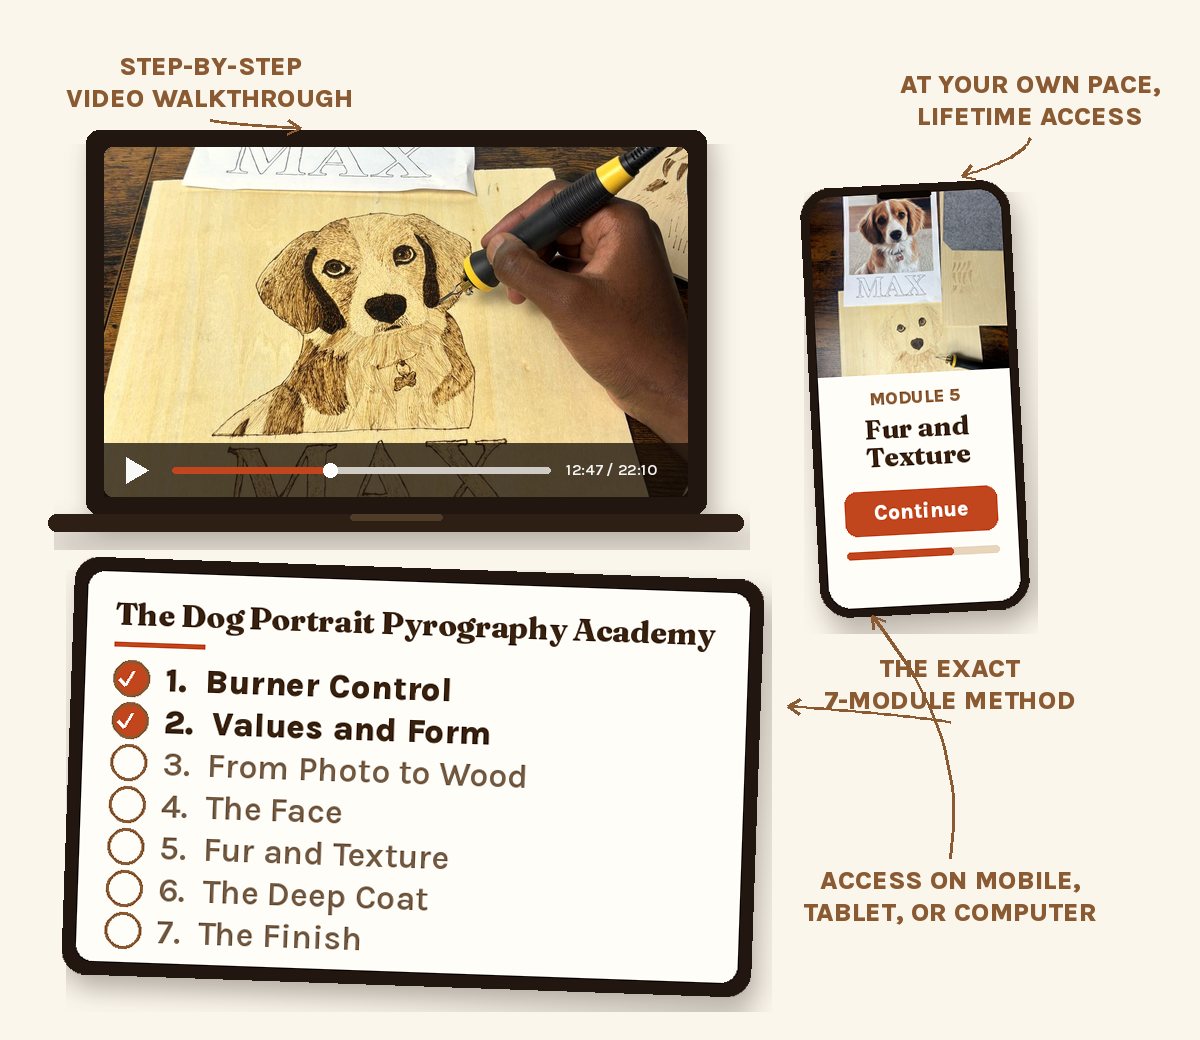
The course on a video lesson, tablet dashboard with all seven modules, and phone
  • 🎬 Step-by-step video walkthrough
  • 📱 Access on mobile, tablet, and computer
  • 🦥 At your own pace
  • ♾️ Lifetime access

Here's A Small Taste Of What's Inside:

Module 1

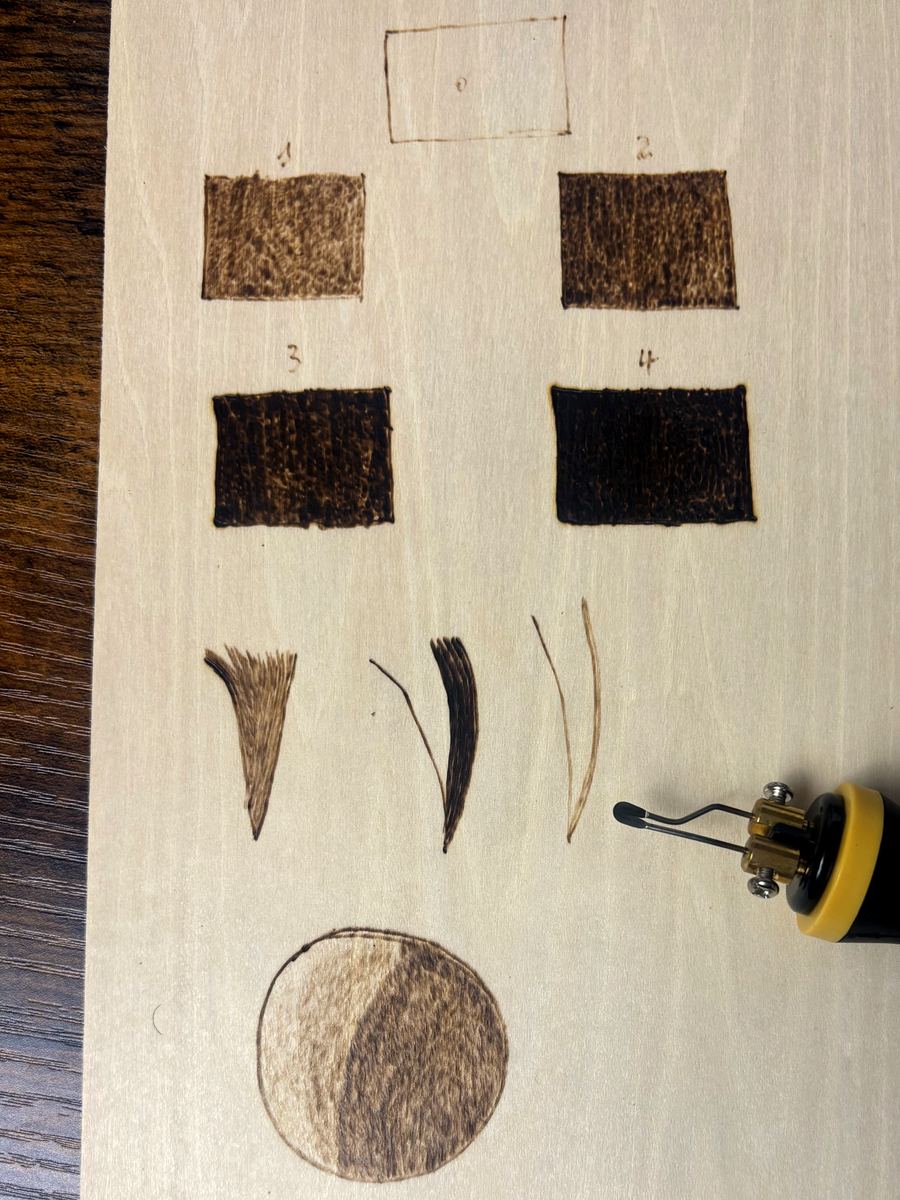
Burner Control. Master the Pen Before It Ever Touches Your Portrait
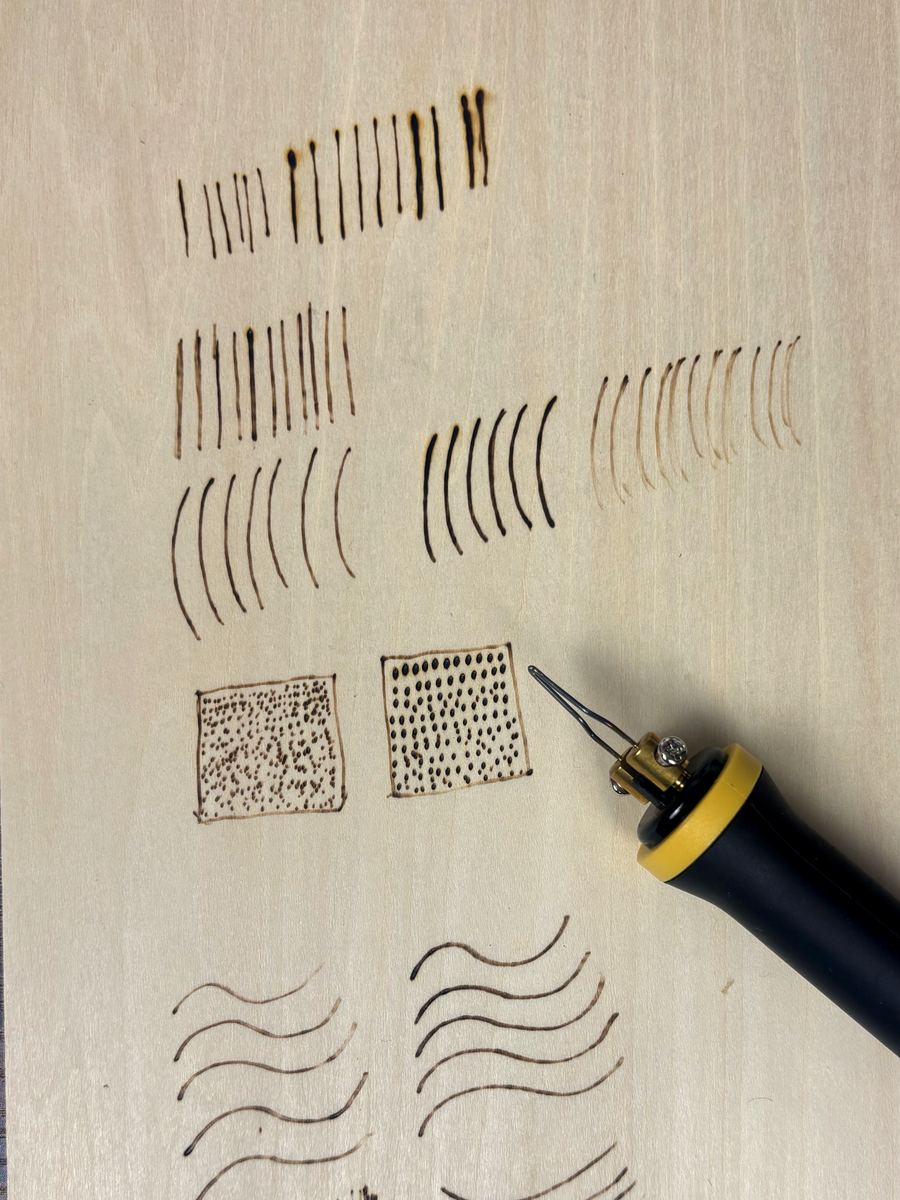
A woodburning practice board with rows of clean lines, curves, tapered flicks, and controlled shading tests

Before a single mark goes near your portrait, you'll get complete command of the pen on practice wood, where mistakes cost nothing.

  • The beginner-friendly woods that make you look good from day one... they're a few dollars a board at any craft store or on Amazon, and I'll show you exactly which to grab (plus the 2-minute sanding prep that makes burning feel like gliding)
  • The temperature-speed-pressure triangle that controls every mark you'll ever burn
  • Why moderate heat and repeated passes beat cranking the dial (this one secret prevents 90% of ruined boards)
  • Clean starts and stops, straight lines, curves, and the tapered flick that becomes fur later
  • How to avoid the blobs, grooves, and accidental dark spots that scream "beginner"
  • The simple safe setup that lets you burn comfortably at the kitchen table

By the end of this module you'll have a burner-control board that proves your hand is ready
Module 2

Values and Form. The Shading System That Makes Wood Look Three-Dimensional

A shading board with a seven-step value scale, smooth gradients, and a shaded sphere and muzzle form

Depth doesn't come from outlines... it comes from light and shadow. This module gives you the value system every stroke of your portrait will be calibrated against.

  • How to build five distinct burn values starting from untouched wood as your lightest tone
  • Smooth gradients with overlapping passes, and feathered edges that melt into the grain
  • Hard, soft, and lost edges: the trick that separates lifelike portraits from coloring-book fills
  • Turn flat shapes into three-dimensional forms (you'll shade a sphere, then a muzzle)
  • How to prevent the muddy medium-brown look that flattens most beginner work

What you'll walk away with: your shading board — the value reference for everything that follows

Module 3

From Photo to Wood. Transfer Your Dog's Portrait (No Drawing Required)

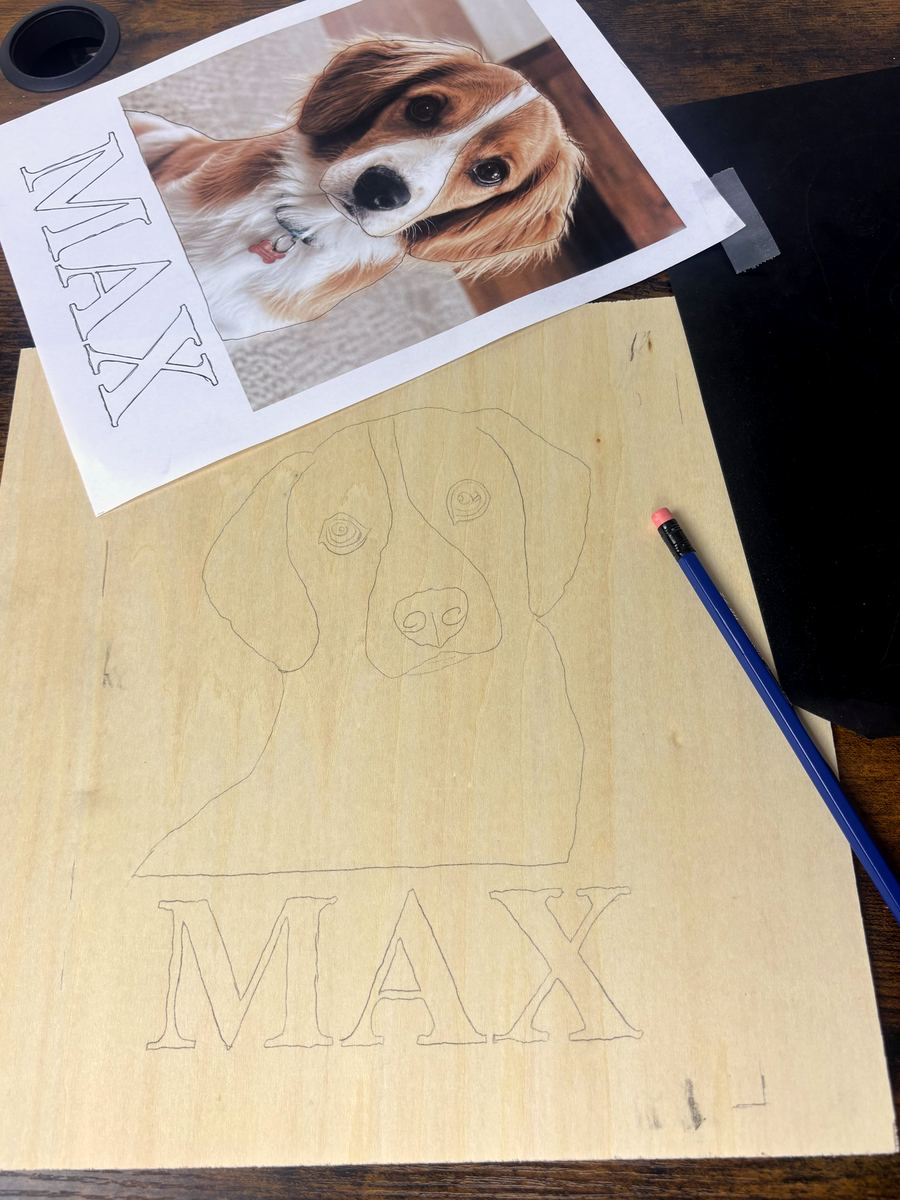
A dog's photo clipped beside a wood board with graphite transfer paper peeled back and the portrait mapped in pencil

Let's kill the biggest myth right here: you do not need to know how to draw. Ever. You'll never sketch your dog freehand... not in this module, not anywhere in this course. Your dog's likeness comes straight from your photo, transferred onto the wood line by line. If you can print a photo and trace, you have every skill this module requires.

  • The reference photo checklist: what makes a photo burn beautifully (and the ones to avoid)
  • How to convert your photo to grayscale and simplify it into 5-7 value groups you can actually follow
  • The graphite transfer method, step by step: what to transfer, and what to deliberately leave out
  • The placement check for eyes, nose, ears, and muzzle that locks the likeness in before any burning
  • How to map shadow boundaries and fur directions so the portrait almost burns itself

On your desk when this module ends: your portrait, transferred and ready to burn

Module 4

The Face. Eyes, Nose, and the Likeness That Makes It YOUR Dog

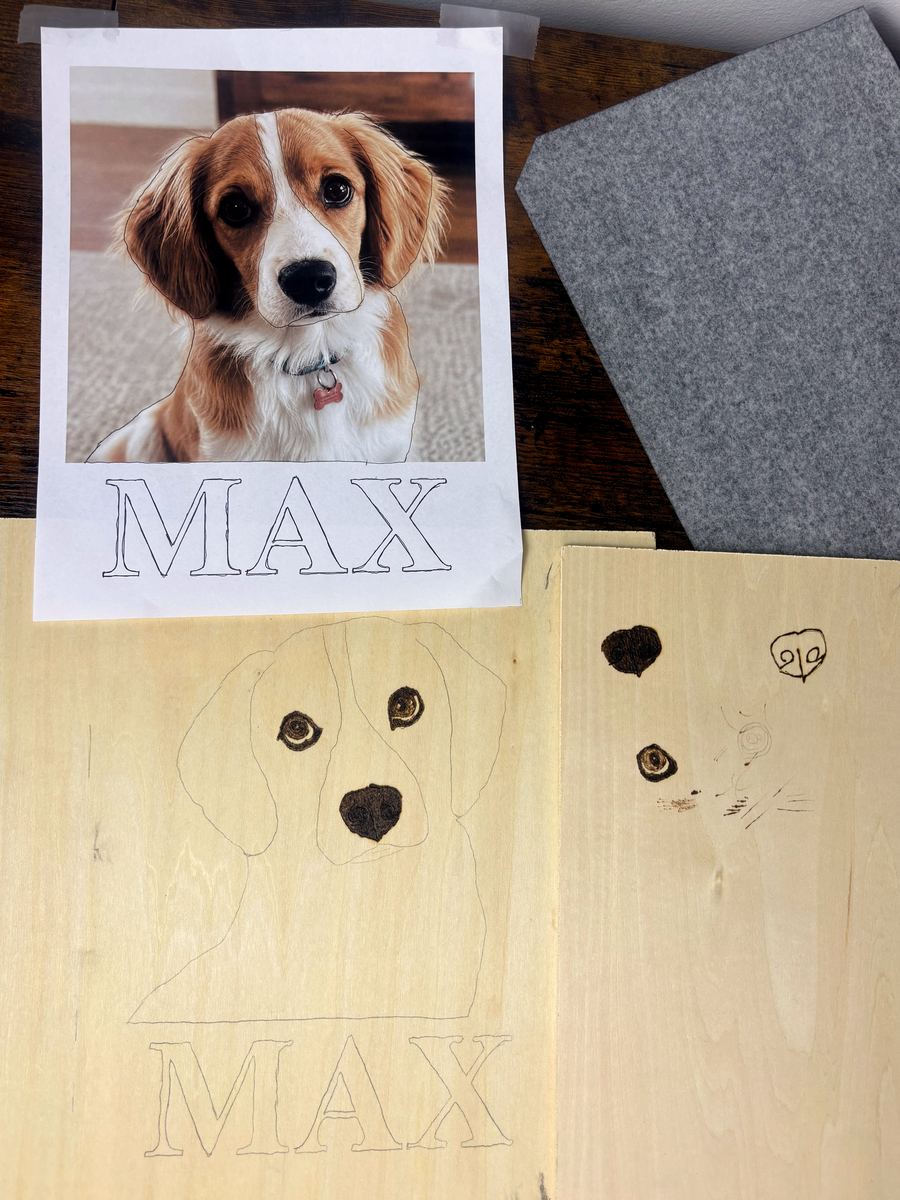
A feature-study board with a burned eye, nose, and muzzle study beside the final board where the face is coming alive

The face carries all the emotion... so you'll rehearse it before you commit. You'll burn an eye, a nose, and a muzzle study on scrap first, using your own dog's photo, then bring the real features to life on your portrait with zero fear.

  • The eye method: catchlights, iris, pupil, and lid shadows that create that "soul" look (no flat black circles)
  • How to burn a nose that stays dark without going featureless, using stippling and broken highlights
  • Whisker pads, lip lines, mouths, and tongues, and how to preserve light whiskers before dark fur surrounds them
  • Where likeness actually lives: eye spacing, muzzle width, ear shape, head silhouette, and your dog's asymmetries

Yours after this module: a feature-study board... and your dog's eyes looking back at you from the wood

Module 5

Fur and Texture. Believable Coats Without Burning Every Strand

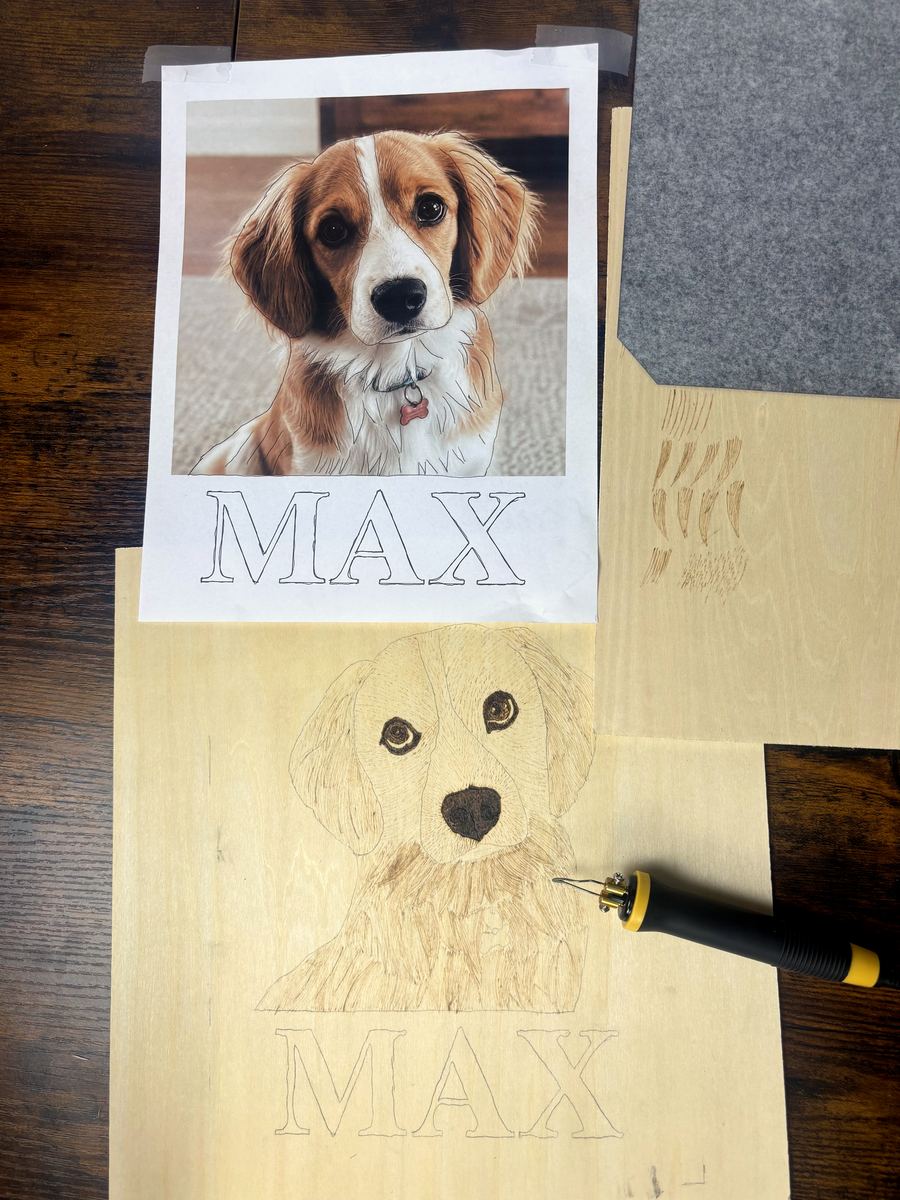
A fur sampler board beside the portrait, its coat rich with layered, directional fur

Here's the professional secret: convincing fur is groups and layers, not individual hairs. You'll build a texture sampler customized to YOUR dog's coat, then lay your first light pass radiating out from the features you've already burned.

  • Fur-growth direction mapping, and why fur gets built over a soft shadow base instead of onto bare wood
  • The sampler method: test every stroke on scrap until your hand knows it... then bring it to the portrait with zero fear
  • The first-pass rule: why light, wispy, and patient beats dark and committed on layer one
  • How to preserve the light whiskers and bright fur edges you planned in Module 4

What you'll have made: a fur sampler built for YOUR dog's coat, and a portrait with its coat coming alive

Module 6

The Deep Coat. Build the Fur Zone by Zone Until It Looks Real

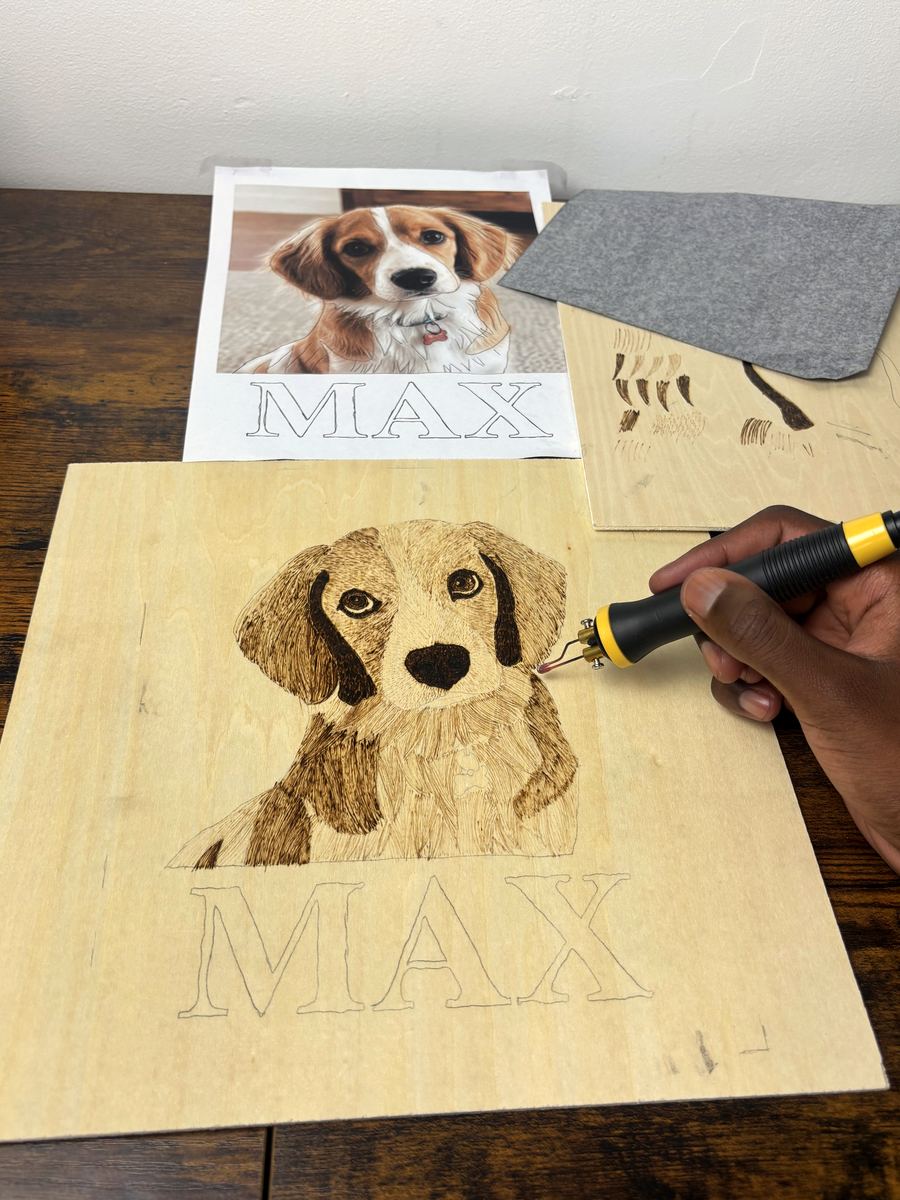
A practice board with the dog's own ear, cheek, brow and chin shapes each burned in three progressively deeper fur passes, beside the portrait

This is where the hours live... and where the magic compounds. Using the same zone map you transferred in Module 3, you'll practice each section's fur on a study board first — one ear, three passes, from light wisps to full depth — then build the real thing, zone by zone, always calibrated against the eyes and nose.

  • The zone-by-zone build order that keeps a big coat from ever feeling overwhelming
  • The stroke changes for short, long, curly, and wiry coats (you practice only what your dog needs)
  • Passes two and three: how each layer adds depth without muddying the one beneath
  • Why keeping secondary areas softer makes the face hit even harder
  • How to fix an area you've burned too dark without sanding the whole board

When this module ends: a zone practice board that proves every section... and a coat with real depth on your portrait

Module 7

The Finish. The Name, the Last Fur Pass, and the Seal

The completed portrait with a hand finishing the final stroke of the burned name lettering, freshly sealed

The last 10% is what turns a project into a piece. You'll balance the whole portrait, burn your dog's name, and seal it so it's still on the wall decades from now.

  • The final value-balancing pass: deepening shadows under ears, chin, and fur overlaps so the eyes and nose stay the stars
  • Clumping and silhouette-breaking: the techniques that make coats look deep and touchable
  • Knowing when it's finished (most beginners stop one layer too early... or three too late)
  • The name-lettering method: your dog's name in clean letters that look laser-crisp, not shaky

And in your hands at the end: the finished, sealed portrait, ready for the wall

Why you'll be paying less for this course

Let me be straight with you.

Everything inside this course... the full module library, the practice boards, the bonuses... would normally be priced at $97. And honestly, one finished dog portrait like this sells for more than that on Etsy.

But this is a beta launch. I'm opening a limited number of spots at a reduced price for one reason: I want a first group of students going through it, burning real portraits, and telling me exactly where they get stuck so I can make it even better.

If it works the way I believe it will, the price goes up. If it doesn't, the page comes down. Either way, this price won't last.

So for now, you're getting everything for just $47.

Normally $97
Today only
$47
Yes! I want access to The Dog Portrait Pyrography Academy
Unlock Access Now
Secure Checkout · Privacy Protected
100% money-back guarantee — 30 days, no questions asked

Plus You'll Be Backed By My Unconditional Money Back Guarantee

You don't have to decide right now. Get access, watch the modules, burn your practice board, even start your first portrait. Take 30 full days.

If it's not for you, for any reason at all, send one email to kyme@thepyrographyschool.com and you'll get every penny back within 24 hours. No questions asked. No stalling. No "exit interview."

You either love what you create... or you don't pay for it.

And to help you go even further...

I don't just want you to buy this course. I want you to actually finish a portrait you're proud of, and then another, and another. So I've included a few extra resources that remove every excuse between you and your first burn.

Get 3 FREE Bonuses If You Join Now

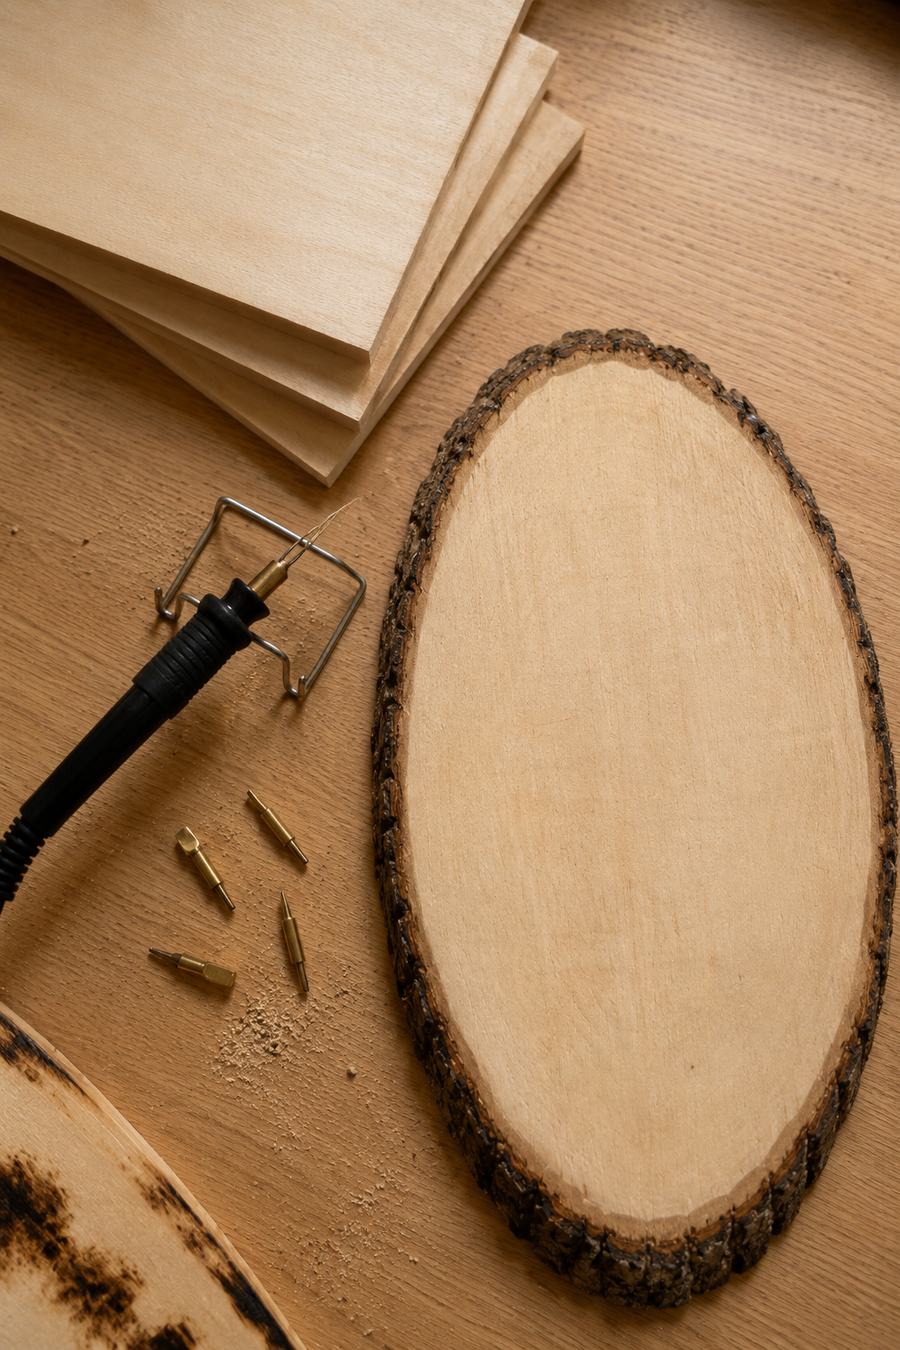
Flat-lay of a wire-nib burner, brass tips, plain basswood boards and a live-edge slab
🎁 Bonus #1

The Burner & Board Buying Guide

Walk into this hobby blind and you'll waste $100 on the wrong pen and wood that fights you. This guide tells you exactly what to buy at every budget, so you can start with confidence on day one.

  • Three complete shopping lists: starter, enthusiast, and pro setups with exact product types
  • The 3 pen tips that cover 95% of dog portrait work (ignore the other 20 in the kit)
  • Which woods burn beautifully for portraits... and the 2 common woods to avoid for safety
  • Where to find live-edge slabs like the one in the photos without overpaying

Value: $17 → Your price: FREE

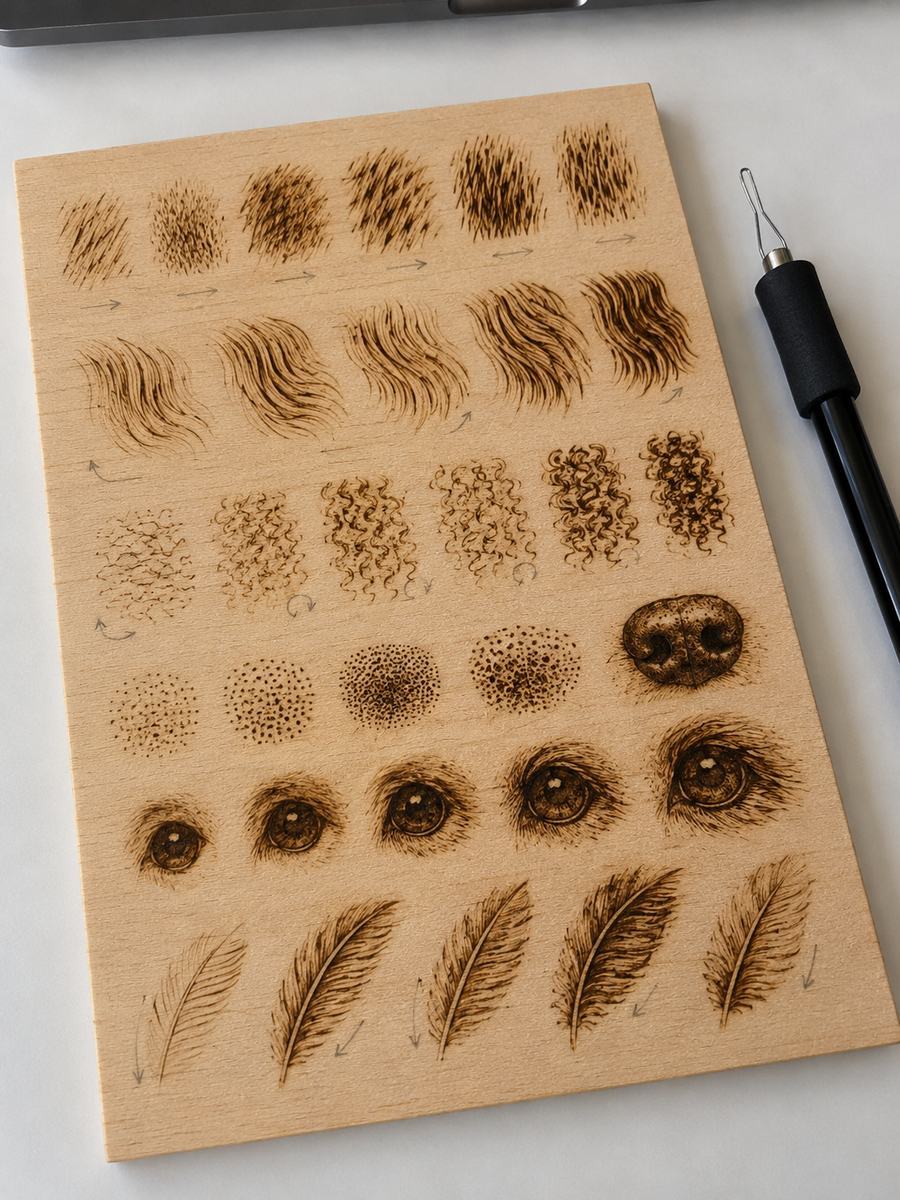
A basswood board filled with rows of burned fur, nose, eye and feather swatches with pencil direction arrows
🎁 Bonus #2

The Fur & Feature Stroke Library

This is the cheat sheet you'll keep next to your board for every single portrait. One page per texture: the stroke, the tip, the heat setting, and a photo of the finished swatch.

  • 12 ready-to-copy fur and feature swatches covering dogs, cats, and horses
  • Heat and tip settings listed for every swatch, so there's zero guessing
  • A printable fur direction map template you can sketch over any photo
  • Learn to diagnose your own work with the "too dark / too flat / too fuzzy" fix chart

Value: $14 → Your price: FREE

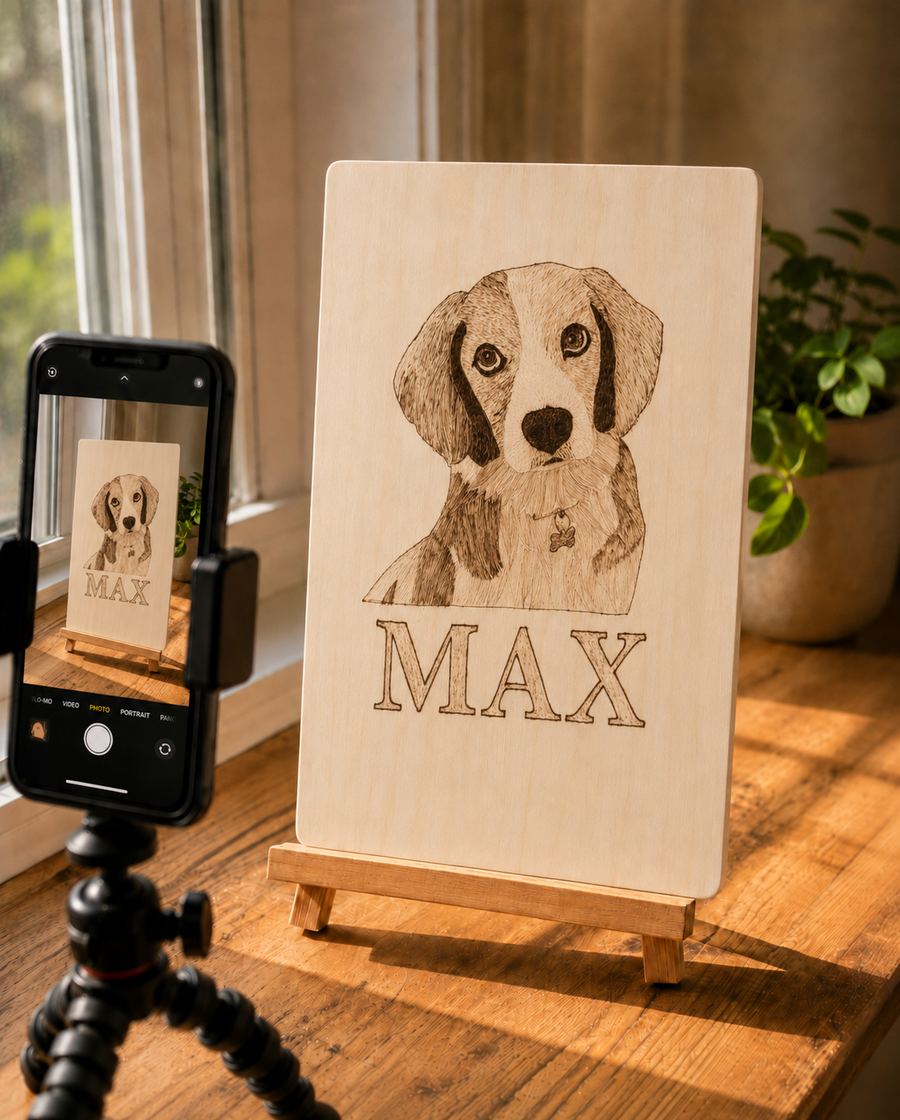
The finished MAX portrait on a small easel by a bright window, with a phone on a tripod set up to photograph it
🎁 Bonus #3

Photograph, Frame & Show Off Your Portraits

You spent hours on this piece. A dark, blurry phone photo does it zero justice. This mini-guide shows you how to photograph wood art so the texture and burn tones actually come through.

  • The window-light setup that makes burn tones glow (no equipment needed)
  • How to angle the board so wood grain and texture show in photos
  • Simple editing settings for warmth and contrast that don't look filtered
  • Discover display options: easels, floating mounts, and gift-wrapping ideas people remember

Value: $13 → Your price: FREE

Here's Everything You're Getting So Far:

The course on laptop, phone and tablet, plus the three free bonus guides
The Dog Portrait Pyrography Academy$97
Module 1: Burner Control. Master the Pen Before It Ever Touches Your Portrait
Module 2: Values and Form. The Shading System That Makes Wood Look Three-Dimensional
Module 3: From Photo to Wood. Transfer Your Dog's Portrait (No Drawing Required)
Module 4: The Face. Eyes, Nose, and the Likeness That Makes It YOUR Dog
Module 5: Fur and Texture. Believable Coats Without Burning Every Strand
Module 6: The Deep Coat. Build the Fur Zone by Zone Until It Looks Real
Module 7: The Finish. The Name, the Final Pass, and the Seal
Bonus #1: The Burner & Board Buying Guide$17
Bonus #2: The Fur & Feature Stroke Library$14
Bonus #3: Photograph, Frame & Show Off Your Portraits$13
Total Value: $141
But now you get everything for just: $47
Normally $97
Today only
$47
Yes! I want access to The Dog Portrait Pyrography Academy
Unlock Access Now
Secure Checkout · Privacy Protected

Got more questions? I got you:

Need help? kyme@thepyrographyschool.com

What is the format of the course?
Seven modules of step-by-step video lessons, plus downloadable guides and reference sheets. You watch a lesson, then burn along at your own pace — everything lives in a private course area you can open on your phone, tablet, or computer.
Where and when does the course take place?
It's 100% online and starts the moment you enroll. There are no live sessions to attend and no schedule to keep — every lesson is pre-recorded, so you learn whenever it suits you. Evenings, weekends, 20 minutes at a time... it's your call.
Do I need any previous experience to start this course?
None at all. The course assumes you've never touched a pyrography pen. Module 1 starts from the very first steps — which wood to buy, how to set up at your kitchen table, how to hold the pen — and every skill is built from zero on practice boards before anything goes near your portrait.
What if I don't know how to draw?
Perfect — you don't need to. The whole system is built on transferring, not freehand drawing: your dog's likeness comes straight from your photo onto the wood, line by line. If you can print a photo and trace, you have every skill this course requires.
How much time does it take?
Plan on 2 to 4 hours of lessons plus practice. Most students finish their first full portrait within 2 to 3 relaxed weekends. And because you have lifetime access, there's zero pressure to rush.
What equipment do I need to start?
A basic woodburning pen (starter pens begin under $20 on Amazon), a couple of basswood boards, and a printed photo of your dog. Bonus #1 gives you exact shopping lists so you buy once and buy right.
Is woodburning safe to do at home?
Yes — it's one of the calmest crafts there is. You work with the same kind of everyday care as a clothes iron: the pen rests on its own stand, you burn untreated wood only, and you work in a ventilated space. Module 1 shows you the exact setup, and you'll be comfortable with it in your first five minutes.
Is this a one-time payment?
Yes. $47 once. No subscription, no upsells required to finish your portrait.
How long do I have access?
Forever. One payment, lifetime access, including every future update to the course.
How does the money-back guarantee work?
Simply. Enroll, and take a full 30 days to go through everything — watch the lessons, burn your practice boards, even start your portrait. If you decide it's not for you, for any reason, send one email to kyme@thepyrographyschool.com and you'll get a full refund within 24 hours. No forms, no questions, no hard feelings.

If you've read this far, part of you has already pictured your dog's portrait on the wall. Let's make it real.

Here's Everything You're Getting Now For Just $47:

The Dog Portrait Pyrography Academy$97
Module 1: Burner Control. Master the Pen Before It Ever Touches Your Portrait
Module 2: Values and Form. The Shading System That Makes Wood Look Three-Dimensional
Module 3: From Photo to Wood. Transfer Your Dog's Portrait (No Drawing Required)
Module 4: The Face. Eyes, Nose, and the Likeness That Makes It YOUR Dog
Module 5: Fur and Texture. Believable Coats Without Burning Every Strand
Module 6: The Deep Coat. Build the Fur Zone by Zone Until It Looks Real
Module 7: The Finish. The Name, the Final Pass, and the Seal
Bonus #1: The Burner & Board Buying Guide$17
Bonus #2: The Fur & Feature Stroke Library$14
Bonus #3: Photograph, Frame & Show Off Your Portraits$13
Total Value: $141
Normally $97
Today only
$47
Yes! I want access to The Dog Portrait Pyrography Academy
Unlock Access Now
Secure Checkout · Privacy Protected